Easy Crepe Paper Wisteria: Step-by-Step Craft
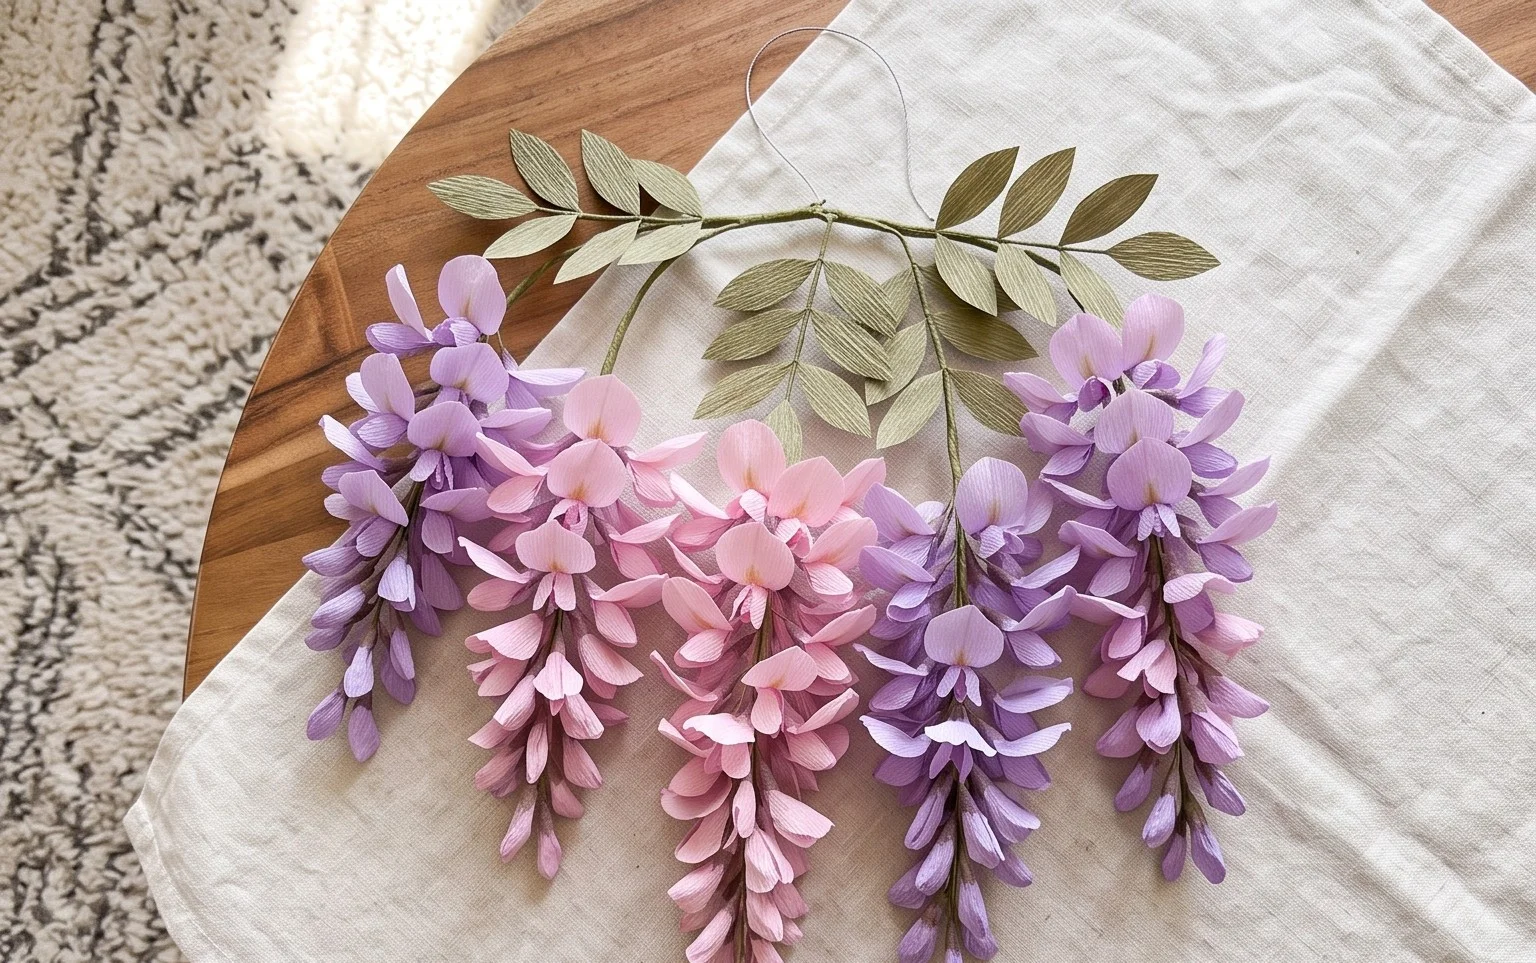
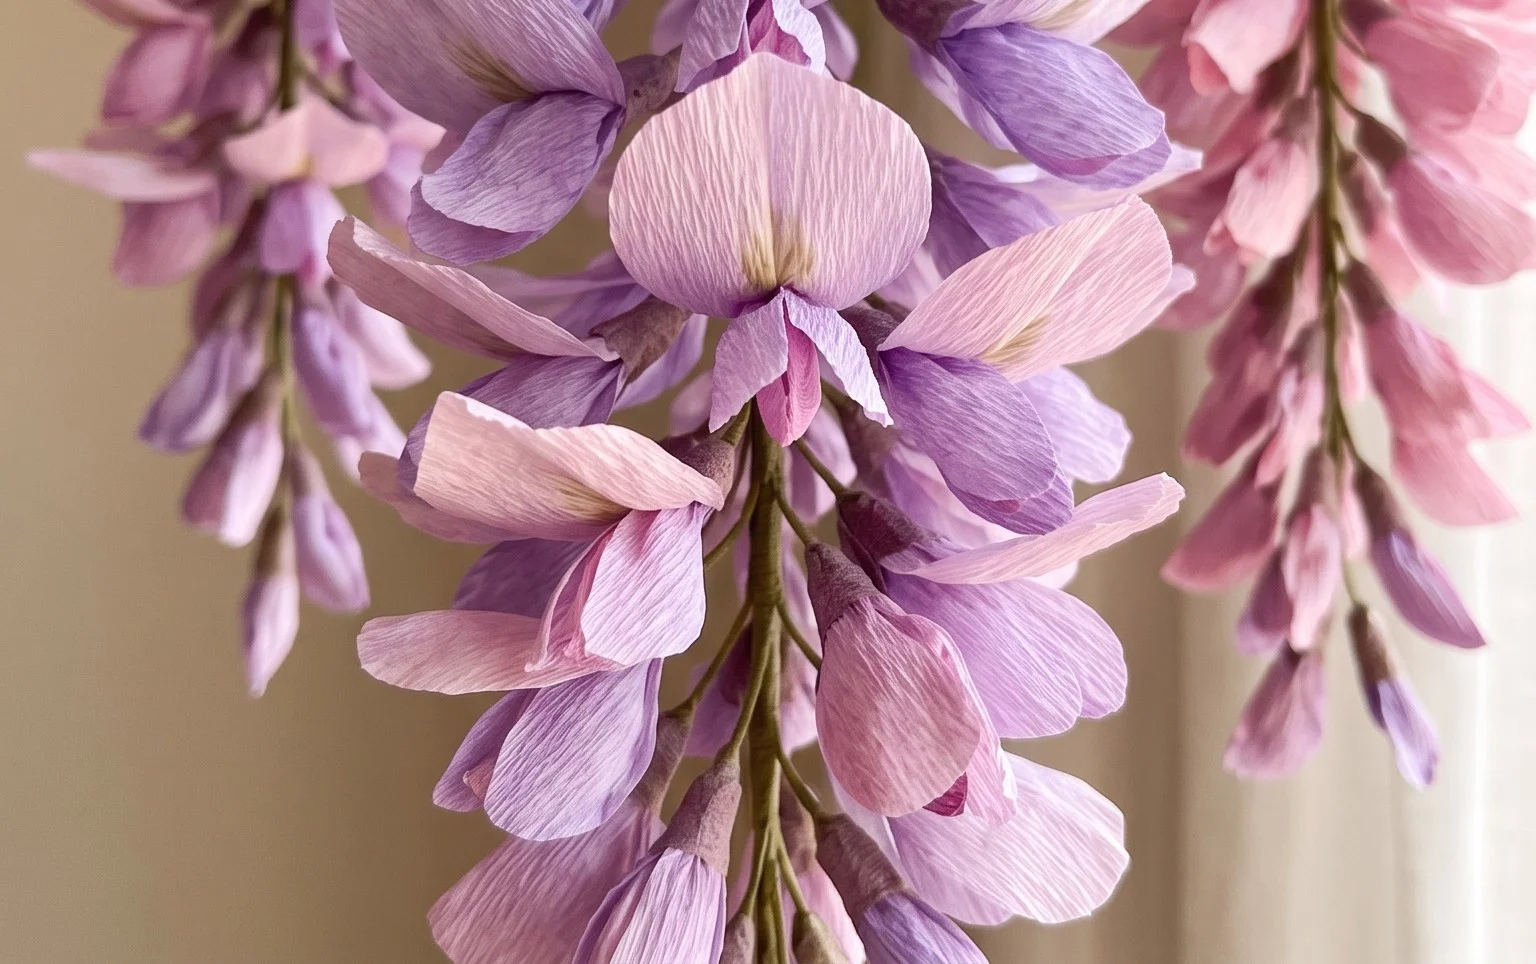
How to Make Crepe Paper Wisteria is a delightful project that will bring a touch of whimsical elegance to your home! Imagine delicate, cascading clusters of purple blooms, just like the real thing, but crafted entirely from soft, pliable crepe paper. This tutorial is perfect for complete beginners and will be a joy for kids to create too. In about 30-45 minutes, you’ll transform simple paper into a stunning decoration that’s ideal for brightening up a room or as a thoughtful handmade gift.
We’ll be exploring how to shape and layer crepe paper to achieve those beautiful, natural-looking petals. You’ll learn simple folding techniques and discover how to give your wisteria a realistic, three-dimensional form. Get ready to get your hands a little crafty and have some fun!
Crafting Cascading Beauty: Your Guide to Making Crepe Paper Wisteria
Welcome to the wonderful world of crepe paper flowers! Today, we’re going to embark on a delightful journey to create stunning wisteria blooms. These delicate, cascading flowers are a joy to make and will bring a touch of ephemeral beauty to any space. Don’t worry if you’re new to paper crafting; this tutorial is designed with beginners in mind, and we’ll take it step-by-step, ensuring your wisteria turns out beautifully.
Choosing Your Canvas: The Right Paper for Wisteria
The magic of crepe paper flowers lies in the paper itself. For our wisteria, we need a paper that has a good stretch, can hold a fold, and offers a subtle texture.
- Type of Paper: We’ll be using crepe paper. Not just any crepe paper, though! For wisteria, you’ll want to use a good quality, slightly heavier crepe paper. Think along the lines of Italian double-sided crepe paper or a crafting-specific crepe paper designed for floristry. This type of crepe paper has a noticeable grain or stretch that allows you to gently shape the petals. Avoid the super thin, flimsy crepe paper you might find in party supply stores for decorations; it won’t hold its shape well for delicate petals.
- Weight: Aim for a weight between 120-180 GSM (grams per square meter). This provides enough substance to create sturdy petals while still being pliable enough to shape.
- Size: The size of your starting paper will determine the size of your wisteria blooms. For a standard, versatile bloom, starting with squares of around 4 inches (10 cm) by 4 inches (10 cm) is a good choice. You can absolutely experiment with larger or smaller squares later to create variations.
- Single or Double-Sided: For wisteria, I highly recommend using *double-sided* crepe paper. This is crucial because our wisteria petals will be seen from all angles, and we want a consistent, beautiful colour on both sides of each petal. Single-sided crepe paper will leave you with a white or lighter underside, which isn’t ideal for achieving that rich, full wisteria look.
Foundation for Flourish: Understanding Base Folds
Before we get to the wisteria itself, let’s ensure we have a solid understanding of the fundamental folds needed. Clean folds are the bedrock of any successful origami or papercraft project, and they’re especially important when working with delicate materials like crepe paper.
The Valley Fold: Creating a Crease Inward
Imagine you’re folding a piece of paper in half so that the crease dips *downward*, like a valley. To make a clean valley fold, start by aligning the two edges or corners precisely. Once they are perfectly aligned, gently run your finger along the edge, starting from the center and moving outwards. Don’t press too hard initially; you want to create a soft crease first. Then, go back over it with a bit more pressure to make it sharp and defined. The key is to work from the center out, ensuring no air is trapped and the paper doesn’t ripple.
The Mountain Fold: Creating a Crease Outward
This is the opposite of a valley fold. Imagine folding the paper so the crease *pushes upward*, like the peak of a mountain. To make a clean mountain fold, you’ll typically perform a valley fold first, then unfold the paper. The crease you just made will now be the guideline for your mountain fold. To execute it, you’ll push the paper upwards along that existing crease, bringing the two sides together in a way that the crease stands proud. Again, precise alignment of edges or corners is vital before you start creasing.
The Wisteria Bloom: A Step-by-Step Folding Sequence
Now, let’s bring our wisteria to life! Grab your square of double-sided crepe paper.
Step 1: The Diagonal Foundation
Place your square of double-sided crepe paper in front of you, oriented like a diamond (one corner pointing up, one down, one left, one right). Bring the bottom corner up to meet the top corner perfectly. Align the edges precisely. Crease firmly down the center diagonal line from top to bottom. You now have a triangle. Unfold it.
Step 2: The Second Diagonal Foundation
Turn the paper so it’s a square again, but rotated 45 degrees from its original position. Now, bring the left corner over to meet the right corner perfectly. Align the edges precisely. Crease firmly down the center diagonal line from left to right. You will have another triangle. Unfold it.
Step 3: Creating the Preliminary Base
You should now have two diagonal creases forming an “X” on your square. Flip the paper over so the side that was previously facing you is now underneath. With the “X” creases now showing as mountain folds, gently push the left and right sides of the square inwards towards the center. As you do this, the top and bottom points will naturally come together. Flatten the model. You should now have a smaller, double-layered square. This is a preliminary base for many origami models.
Step 4: Forming the Kite Shape
Orient this smaller square so the open flaps are pointing towards you. Take the right flap (the top layer only) and fold its right edge inwards to meet the center vertical crease. Align it precisely. Crease firmly. Repeat this with the left flap (the top layer only), folding its left edge inwards to meet the same center vertical crease. Align it precisely. Crease firmly. Your model should now resemble a kite shape on the top layer.
Step 5: Creating the Petal Layer
Flip the entire model over. Repeat Step 4 on this side. Take the right flap (top layer only) and fold its right edge inwards to meet the center vertical crease. Align it precisely. Crease firmly. Take the left flap (top layer only) and fold its left edge inwards to meet the center vertical crease. Align it precisely. Crease firmly. You should now have a kite shape on both sides.
Step 6: Tucking the Points
Now, look at the top point of your kite shape. You’ll see small triangular flaps at the very top. Take the top right triangular flap (top layer only) and tuck it *behind* the main kite shape, sliding it into the pocket created by the fold in Step 5. The point should align with the bottom of that folded section. Crease gently to secure it. Repeat with the top left triangular flap (top layer only), tucking it behind and into the pocket. Crease gently.
Step 7: The Final Shaping
Flip the model over and repeat Step 6 on this side. Take the top right triangular flap and tuck it behind, sliding it into the pocket. Crease gently. Take the top left triangular flap and tuck it behind, sliding it into the pocket. Crease gently. Your model should now look like a somewhat flat, elongated diamond or teardrop shape.
Step 8: Opening and Puffing
Hold the model with the pointed end facing upwards. Gently insert your finger into the opening at the bottom of the model. Carefully pull the two sides apart, allowing the paper to naturally expand and puff outwards. The previous folds will help guide this. You want to create a rounded, slightly bulbous shape, like a small cluster of wisteria flowers. Be gentle, as crepe paper can tear if pulled too forcefully.
Common Pitfalls and How to Sidestep Them
Even with clear instructions, beginners can sometimes encounter a few tricky spots. Here’s where people often go wrong and how to avoid it:
- Imprecise Alignments: This is the number one culprit for wonky folds. If your corners don’t meet edges perfectly in the early steps, the entire model will be off-kilter.
- How to Avoid: Take your time! Seriously, slow down. Before you make any crease, double-check that the corners are perfectly aligned and the edges are flush. Use your fingernail to lightly pinch the corners together before committing to the full crease.
- Over-Creasing or Ripping the Crepe Paper: Crepe paper is forgiving but has its limits. Pressing too hard, especially in delicate areas or when trying to force a fold, can lead to rips.
- How to Avoid: Use the “soft crease first, then firm up” method. Run your finger gently along the fold line to establish its position. Then, go back and make it a sharp crease. For the puffing stage (Step 8), be patient. If it feels resistant, gently ease it open rather than yanking.
- Not Understanding the “Pocket” for Tucking: Tucking the points in Step 6 can be confusing if you don’t see the pocket.
- How to Avoid: After Step 5, when you’ve folded the kite shapes on both sides, look closely at the top point. You’ll see that the folds you made create a small opening or “pocket” just below the very tip of the top layer. This is where you slide the small triangular flaps. Gently open the layers a tiny bit to reveal and access these pockets.
A Garden of Variations: Customizing Your Wisteria
The beauty of this origami wisteria is its adaptability. Once you’ve mastered the basic fold, you can play around with different looks:
- Size Matters: As mentioned, starting with different sized squares will yield different sized blooms. Try 2-inch squares for tiny, delicate clusters, or 6-inch squares for more substantial flowers. You can even layer smaller flowers onto larger ones for added depth.
- Paper Patterns and Colors: While traditional wisteria is purple or white, don’t be afraid to experiment!
- Patterned Paper: Delicate floral patterns or even subtle watercolour prints on your double-sided crepe paper can create a unique, artistic effect.
- Ombre or Gradient Paper: If you can find double-sided crepe paper with an ombre effect, where the color fades from dark to light, it will create a stunning visual within each bloom.
- Color Combinations: Try using two slightly different shades of purple or pink together for a more complex and realistic look. You could even try unexpected colors like a soft blue or a peachy coral for a whimsical twist.
- Adding a Stem: For a more complete flower, you can attach your wisteria bloom to a floral wire or a rolled piece of green paper. Simply poke the wire or stem through the bottom opening before you fully puff out the flower, securing it with a dab of glue.
Displaying Your Delicate Blooms and Gifting with Grace
Once your wisteria blooms are crafted, the fun of arranging and sharing them begins!
- Cascading Garlands: The most iconic way to display wisteria! String your blooms together using fishing line or thin thread, allowing them to hang in lovely cascades. You can hang these across doorways, windows, or along a mantelpiece for a truly enchanting effect.
- Wisteria Tree/Branch: Secure several blooms to a real or artificial branch. You can spray paint a fallen branch white or silver for a magical look. This makes a stunning centerpiece.
- Tabletop Arrangements: Place your wisteria in small vases or jars, perhaps mixed with some faux greenery, for a charming addition to your dining or side tables.
- Gift Toppers: Attach a single bloom or a small cluster to the top of a gift for a handmade, personal touch that elevates any present.
- Memory Keepsakes: For a truly special gift, create a wisteria garland for a friend’s baby shower, wedding, or birthday. It’s a gift that keeps on giving beauty.
- Framed Art: Arrange a few perfectly folded blooms on a neutral background and frame them for a unique piece of wall art.
Making crepe paper wisteria is a rewarding process that combines the meditative nature of folding with the joy of creating something beautiful. Take your time, enjoy the tactile experience of the paper, and don’t be afraid to experiment. Happy folding!
Conclusion
Congratulations on completing your beautiful crepe paper wisteria! We hope you enjoyed this floral origami adventure. Don’t worry if your first wisteria isn’t absolutely perfect; every fold is a learning experience, and practice makes all the difference. We’d love to see your stunning finished model, so feel free to share your creation with friends and family! For your next project, why not try creating different colored wisteria blooms or perhaps a delicate paper cherry blossom? There are so many wonderful paper projects waiting for you to explore. Happy crafting!