Easy Origami Dolphin: Step-by-Step Paper Craft
Origami Dolphin are truly majestic creatures, and bringing one to life with just a piece of paper is an incredibly rewarding experience! In this tutorial, we’ll guide you through folding a beautiful origami dolphin that has a sleek, curved body, a distinct dorsal fin, and a graceful tail. This project is perfect for complete beginners and kids, and it makes a charming little decoration or a thoughtful handmade gift. You can expect to complete your dolphin in about 10-15 minutes. By following these simple, step-by-step instructions, you’ll learn fundamental origami folds and discover how to transform a flat square into a dynamic underwater friend. Let’s get folding and create something wonderful together!
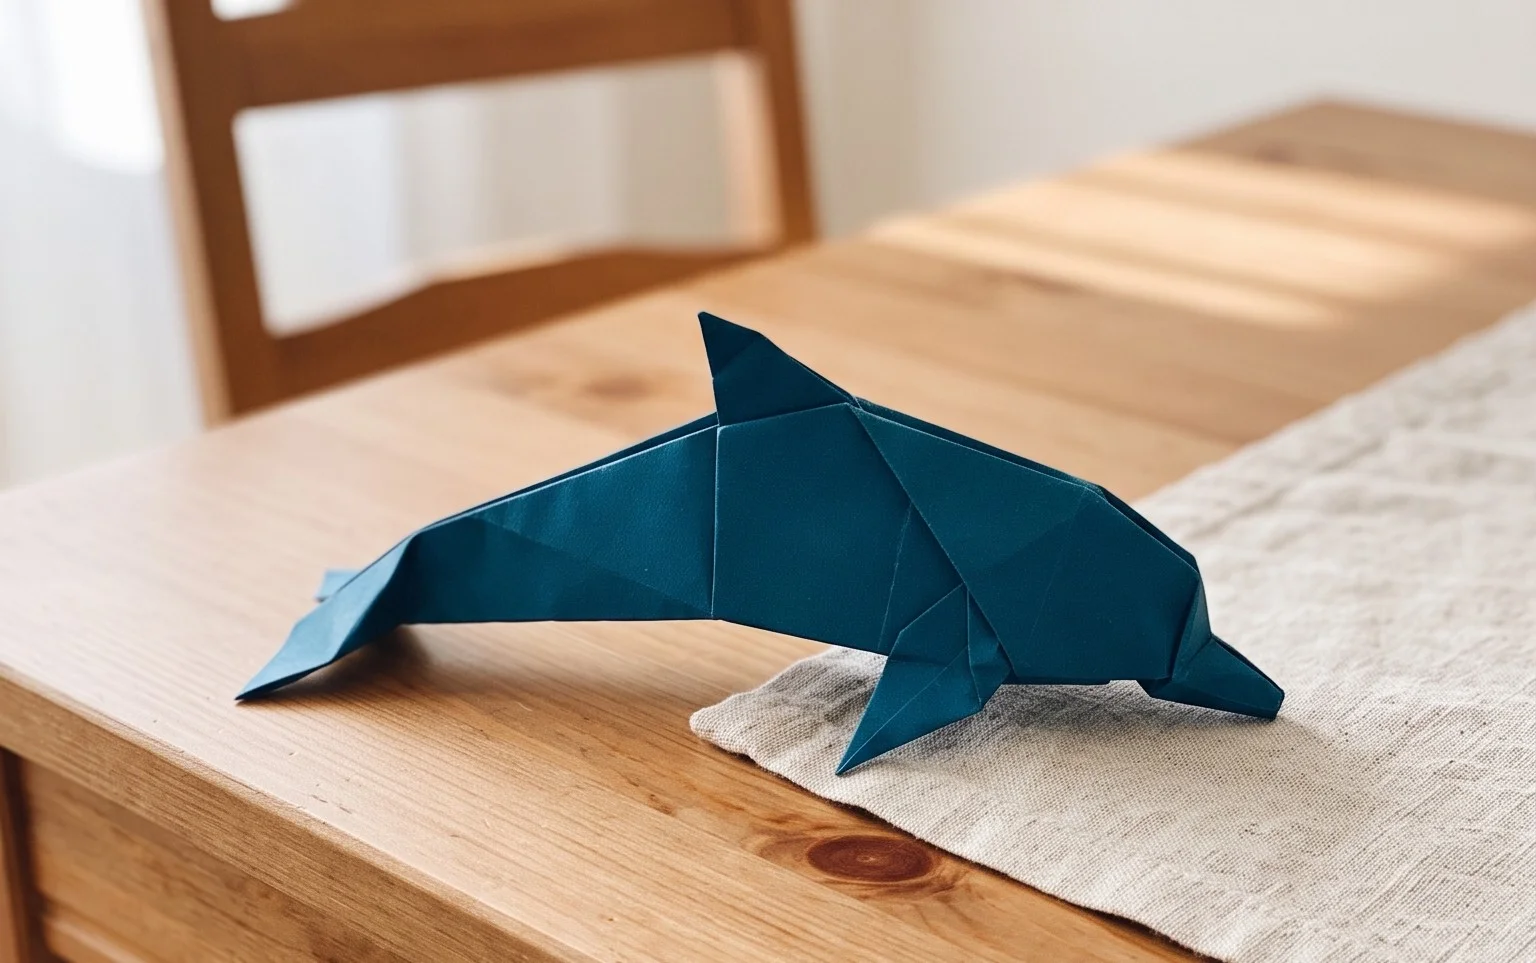
Let’s dive into the wonderful world of origami and create a graceful origami dolphin! This project is a fantastic choice for beginners because it introduces some fundamental folds while resulting in a truly charming finished model. I’ll guide you through each step with clear, easy-to-understand instructions, so you can fold along with confidence.
Origami Dolphin: Step-by-Step Instructions
The origami dolphin is a popular model that captures the elegant curve of a leaping dolphin. With just a bit of patience and careful folding, you’ll have your own aquatic friend ready to swim its way into your heart.
Choosing Your Paper
The type of paper you choose can significantly impact the look and feel of your origami dolphin. For this project, I recommend using standard origami paper.
* **Type:** “Kami” is the most common type of origami paper. It’s thin, crisp, and designed for folding. It holds creases well, which is essential for creating sharp, clean lines in your model.
* **Weight:** Standard origami paper is usually around 70-80 gsm (grams per square meter). This weight is perfect for beginners as it’s not too flimsy and not too thick, making it easy to manage and fold precisely.
* **Size:** For your first few dolphins, I suggest starting with a 6-inch (15 cm) square. This size is manageable for beginners, allowing you to practice the folds without getting lost in tiny details. As you gain confidence, you can experiment with larger or smaller squares.
* **Single or Double-Sided:** Most origami paper is single-sided, meaning one side is colored and the other is white. This is ideal for the dolphin, as the white side can create a nice contrast for the belly or internal details. If you use double-sided paper, you’ll still get a beautiful result, but it might look more uniform. You can also use patterned paper for a unique look! Just ensure it’s a thin, foldable paper.
Understanding the Base Folds
Before we begin the dolphin, let’s quickly go over a couple of essential base folds you’ll be using:
* **The Valley Fold:** This is the most basic fold. You bring two edges or points together, creating a crease that sinks *down* into the paper, like a valley. When you’re told to “valley fold,” imagine the crease forming a “V” shape.
* **The Mountain Fold:** This is the opposite of a valley fold. You fold the paper *away* from you, so the crease sticks *up* like a mountain ridge. You often create a mountain fold by first making a valley fold and then reversing it, or by bringing a fold line to meet another fold line on the opposite side.
It’s crucial to make these base folds cleanly. This means pressing down firmly along the crease with your fingernail or a bone folder to ensure it’s sharp and precise. Sloppy creases will make subsequent steps much harder and result in a less polished final model.
The Folding Sequence: Let’s Make a Dolphin!
We’ll start with a square piece of origami paper, colored side up if you’re using single-sided paper.
1. **Initial Diagonal Fold:** Take your square paper. Bring the bottom-left corner up to meet the top-right corner. Press down firmly to create a sharp diagonal crease. You should now have a triangle.
2. **Unfold:** Open the paper back up to a square. You’ll see a diagonal crease running from the bottom-left to the top-right.
3. **Second Diagonal Fold:** Now, bring the bottom-right corner up to meet the top-left corner. Press down firmly to create another sharp diagonal crease. You should have another triangle.
4. **Unfold:** Open the paper back up to a square. You’ll now have two diagonal creases intersecting in the center, forming an “X.”
5. **Horizontal Fold:** With the colored side up, bring the bottom edge of the square up to meet the top edge. Press down firmly to create a horizontal crease. You should now have a rectangle.
6. **Unfold:** Open the paper back up to a square. You’ll see a horizontal crease across the middle.
7. **Vertical Fold:** Turn the paper so it’s a diamond shape (one point facing you). Bring the left point over to meet the right point. Press down firmly to create a vertical crease. You should now have a taller, thinner diamond.
8. **Unfold:** Open the paper back up to a diamond. You’ll see a vertical crease down the middle.
9. **Forming the Waterbomb Base:** This is a key base! With the colored side still facing up, gently push the left and right sides inwards along the diagonal creases you made earlier. As you push inwards, the top and bottom points will come together. Flatten the paper down so you have a square base with four flaps, with the open edges at the bottom. This is your Waterbomb Base. The colored side should be on the outside of this base.
10. **Folding the Flaps (First Side):** Place the Waterbomb Base in front of you so the open edges are pointing away from you. Take the top layer of the right flap and fold its outer edge to meet the center vertical crease. Press down firmly.
11. **Repeat on the Left:** Now, take the top layer of the left flap and fold its outer edge to meet the center vertical crease. Press down firmly. You should now have a kite shape on the top layer.
12. **Folding the Top Point Down:** Take the top point of this kite shape and fold it downwards. The tip of this point should reach the bottom edge of the folded flaps (where the two flaps meet the center crease). Press down firmly.
13. **Unfolding the Kite and Point:** Unfold the two flaps you just folded to the center, and unfold the top point you just folded down. You’ll see the creases you’ve made.
14. **The Petal Fold (First Side):** This is where the magic happens! Lift the bottom point of the top layer upwards. As you lift, use the creases you just made to open up the paper. The sides will fold inwards, and you’ll push the tip upwards. Flatten the paper into a long diamond shape. This is called a Petal Fold. The colored side will now be on the inside for this section.
15. **Flip and Repeat:** Turn the entire model over. You’ll see a similar flap structure on this side. Repeat steps 10-14 on this side. Fold the right flap’s edge to the center crease, then the left flap’s edge to the center crease. Fold the top point down to the bottom edge of those flaps. Unfold these. Then, perform the Petal Fold by lifting the bottom point upwards and flattening the paper into a long diamond.
16. **Looking at the Model:** You should now have a shape with two long, pointed flaps on the left and two on the right, with a split at the bottom. These are the beginnings of the dolphin’s body and tail.
17. **Folding the Fins:** Take one of the two long flaps on the right. Fold it outwards, so it angles slightly upwards. This will form one of the dolphin’s pectoral fins. Press down firmly. Repeat this for the other long flap on the right to create the second pectoral fin.
18. **Forming the Head and Tail:** Now, look at the two long points at the bottom of your model. We need to differentiate them into the head and tail. Take the rightmost of these two points. You’re going to fold this upwards and slightly to the left. This will be the dolphin’s head and snout. The angle of this fold will determine the slant of the dolphin’s head.
19. **Shaping the Tail:** Take the leftmost of the two long points. Fold this upwards and slightly to the right. This will form the tail fin. You can adjust the angle to make it more pronounced.
20. **Creating the Dolphin’s Curve (Inside Reverse Fold):** This is a crucial step for the dolphin’s signature curve. Look at the body of your dolphin. You’ll see where the head and tail emerge from the main body. Gently open up the body slightly. You want to make a fold *inside* the model that will create the arch. Imagine where the dolphin’s back would curve. You’ll fold this section backwards *inside* the model. To do this cleanly: identify the point where you want the curve to start on the “top” of the dolphin’s body (near the head). Fold this section backwards, tucking it inside the model. You might need to gently open the paper a little to achieve this. Press down firmly on the outside to secure the fold. Repeat this on the other side to create a symmetrical curve. This is often called an Inside Reverse Fold.
21. **Refining the Head:** Now, look at the point you designated as the head. You can refine its shape. You might want to make a small Inside Reverse Fold on the very tip to create a more rounded snout.
22. **Shaping the Tail Fin:** Look at the tail fin. You can make small folds on the edges of the tail fin to give it a bit more shape and definition. For example, you can fold the very tips of the tail fin slightly outwards.
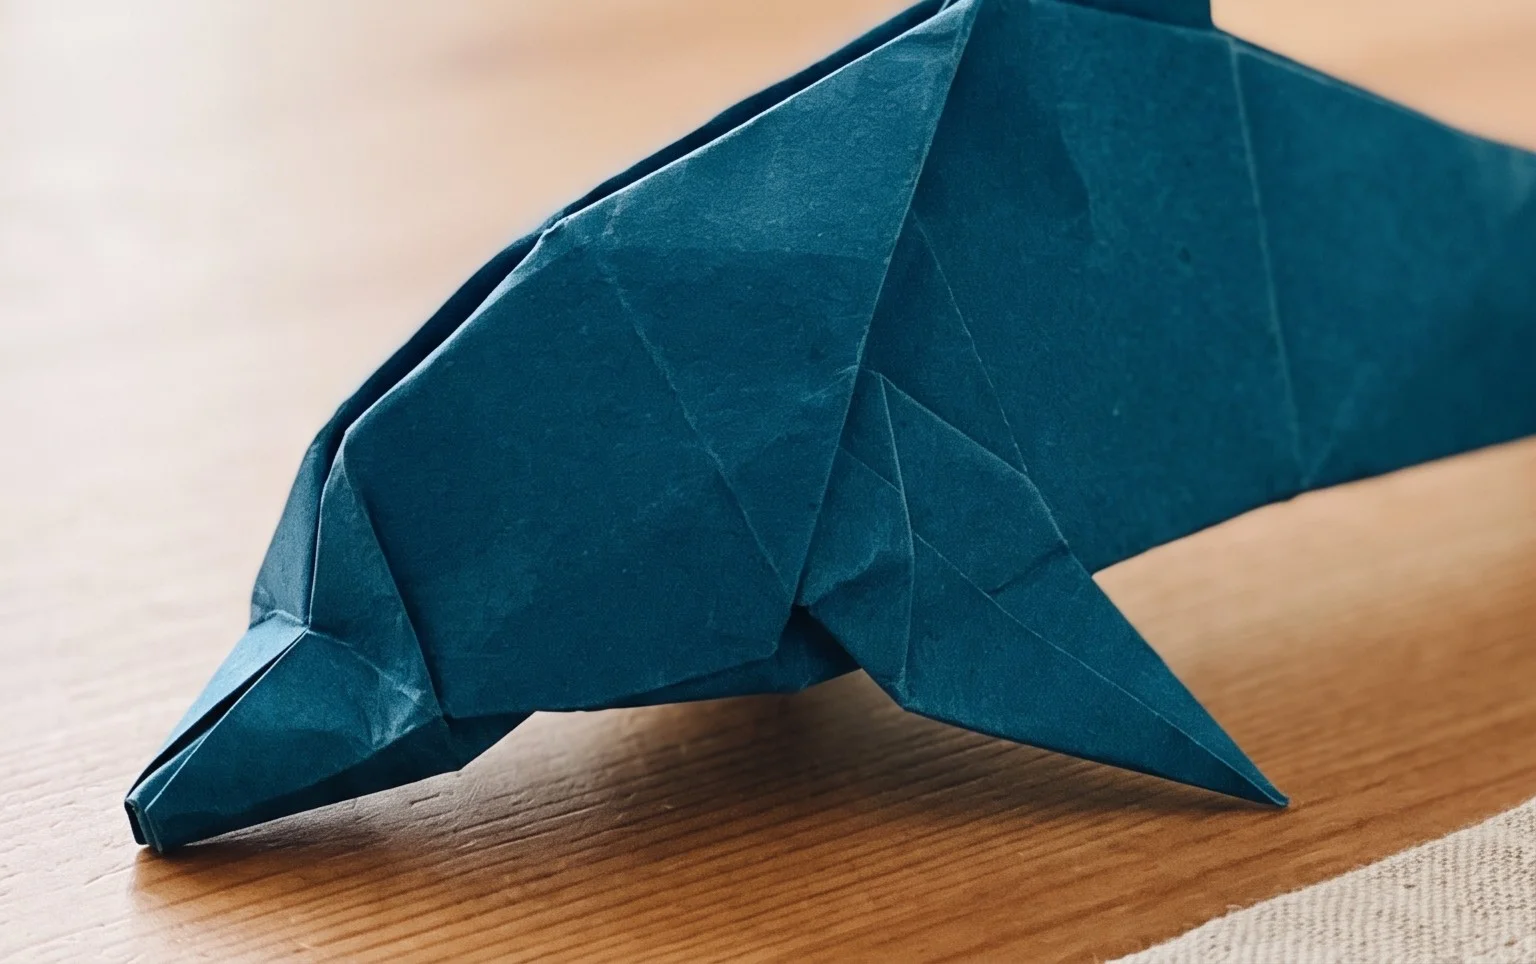
And there you have it – your very own origami dolphin!
Common Beginner Mistakes and How to Avoid Them
Even with the best instructions, there are a few places where beginners often stumble. Don’t worry if you make these mistakes; it’s all part of the learning process!
* **Sloppy Creases:** This is probably the most common issue. If your creases aren’t sharp, the paper won’t align correctly in later steps, leading to a messy model.
* **How to Avoid:** Take your time with each fold. After you bring two edges or points together, use your fingernail, a ruler, or a bone folder to press down firmly along the entire length of the crease. Make sure the paper is perfectly aligned before you press.
* **Misidentifying the “Top” or “Bottom” Flap:** In steps involving the Waterbomb Base and Petal Folds, it’s easy to get confused about which flap to fold or lift.
* **How to Avoid:** Always orient your paper consistently. If a step says “top layer,” make sure you’re only folding the very top piece of paper. If you’re unsure, reread the step and look at the shape you should have. Visualizing the finished dolphin can help you understand the purpose of each flap. For example, the long, thin points will become the head and tail, and the broader sections will form the body.
* **The Inside Reverse Fold for the Curve:** This fold can be tricky because it’s happening *inside* the model. It’s hard to visualize and execute precisely.
* **How to Avoid:** Don’t be afraid to gently open up the model to see where the fold needs to go. Identify the line you want to create. Instead of trying to force it, fold the paper *backwards* along that line, tucking it inside. It’s okay if it’s not perfectly symmetrical on your first try. You can gently adjust it. Think of it as “cinching” the body to create the arch.
Varying Your Origami Dolphin
Once you’ve mastered the basic dolphin, you can have a lot of fun experimenting!
* **Size:** Simply start with a larger or smaller square of paper. A 12-inch (30 cm) square will make a magnificent, larger dolphin, while a 3-inch (7.5 cm) square will create a tiny, adorable one.
* **Paper Pattern:** The sky’s the limit with patterned paper! Look for papers with aquatic themes, abstract designs, or even simple stripes and dots. Just be mindful of how the pattern will look on the finished dolphin – sometimes a busy pattern can obscure the model’s shape.
* **Color:** While we often use colored paper for the outside, consider how the inside color of double-sided paper might show through, or even use metallic or iridescent papers for a special shimmer.
Displaying and Gifting Your Origami Dolphin
Your finished origami dolphin is a beautiful creation that deserves to be showcased!
* **Display:**
* **Desk Buddy:** Place your dolphin on your desk, bookshelf, or windowsill. It adds a touch of whimsy and calm to any space.
* **Mobile:** You can string several origami dolphins together with fishing line or thread to create a charming mobile. Hang it from the ceiling or a lamp.
* **Terrarium or Shelf Decor:** If you have plants or decorative shelves, a well-placed origami dolphin can be a delightful accent.
* **Gifting:**
* **Birthday Present:** A handmade origami dolphin is a thoughtful and unique gift, especially for someone who appreciates crafts or marine life.
* **Party Favors:** For a sea-themed party, a collection of small origami dolphins can make wonderful party favors.
* **”Just Because” Gift:** Sometimes, the best gifts are the unexpected ones! A small, beautifully folded dolphin can brighten someone’s day.
* **Add to a Card:** You can even attach a small origami dolphin to a greeting card for an extra special touch.
Folding origami is a journey of patience and practice, and the origami dolphin is a perfect companion for that journey. Enjoy the process, and celebrate your beautiful creations!
Conclusion
Congratulations on completing your origami dolphin! We hope you enjoyed this fun and accessible paper folding adventure. Don’t worry if your first origami dolphin isn’t perfect; every fold is a learning step. The beauty of paper crafting is in the process and the satisfaction of creating something unique. We encourage you to share your finished dolphin with friends and family – spread the joy of origami!
For your next challenge, try creating a smaller, more detailed origami dolphin or experiment with patterned paper for a vibrant ocean dweller. There are countless other exciting paper projects waiting for you to discover. Keep folding and exploring the wonderful world of origami!