Easy Origami Peacock: Step-by-Step Paper Craft
Origami Peacock tutorials are a fantastic way to bring a touch of elegance and vibrant color into your home! Imagine a stunning peacock, its long, fanned tail unfurling with intricate detail, and a regal body poised and ready to impress. This beautiful model is perfect for complete beginners and older children alike, making it a wonderful project for a quiet afternoon or a thoughtful handmade gift. In about 30-45 minutes, you’ll learn the fundamental folds and techniques needed to create this majestic bird. We’ll guide you through each step, from transforming a simple square of paper into a graceful neck and head, to meticulously crafting that show-stopping tail. Get ready to unfold your creativity and let’s fold this magnificent peacock together!
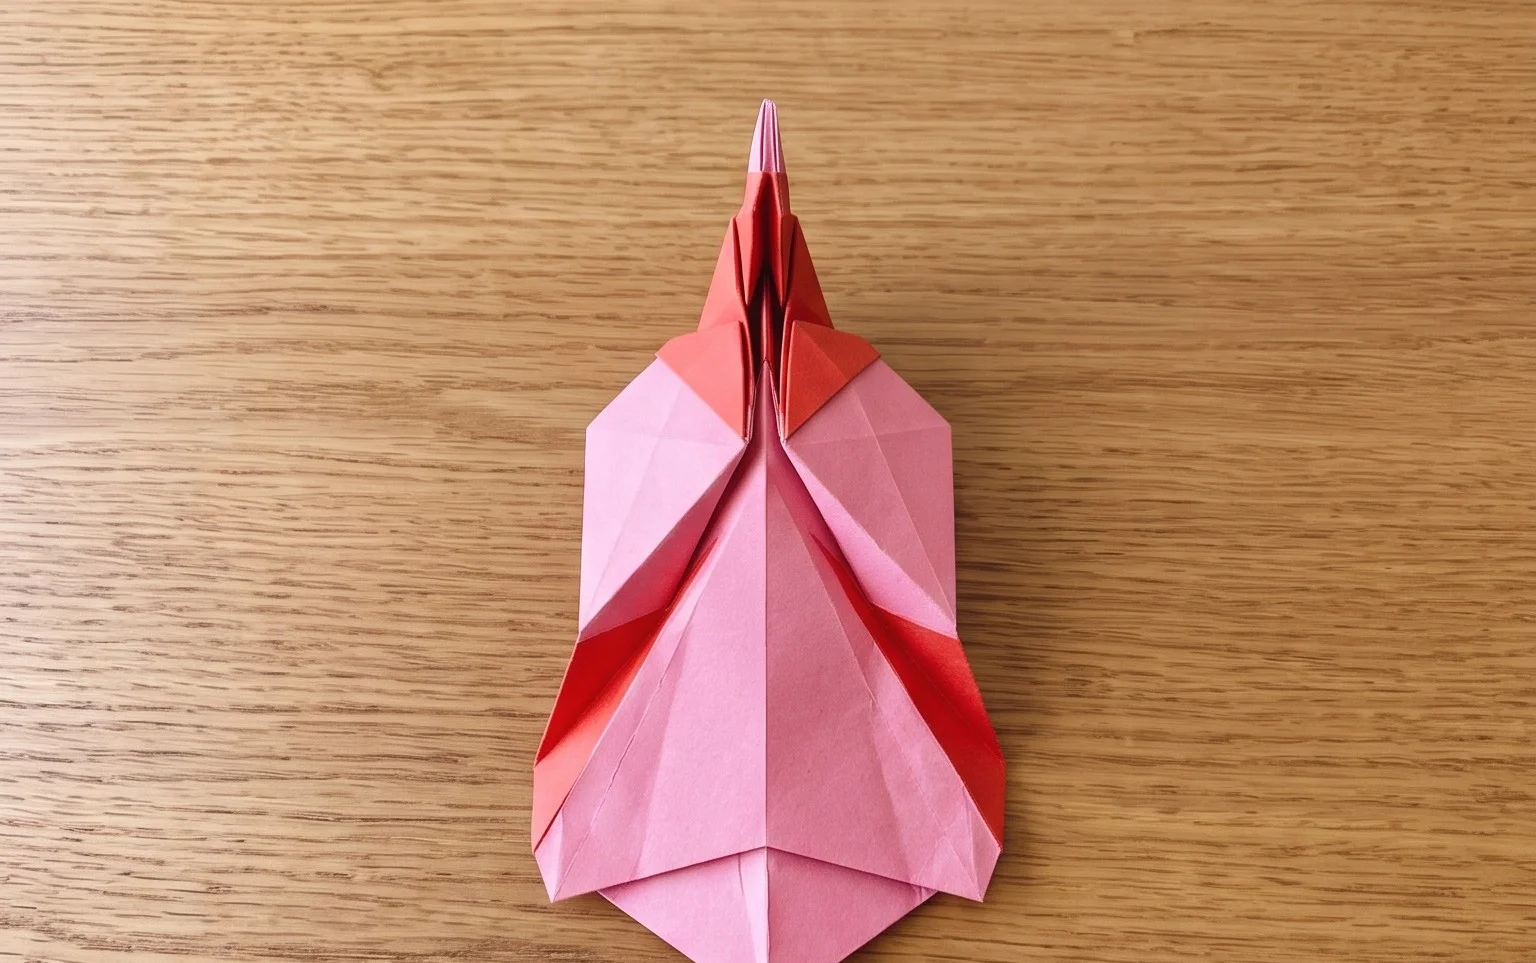
This tutorial will guide you through folding a beautiful origami peacock. It’s a slightly more complex model than some beginner folds, but with a little patience and careful attention to detail, you’ll be able to create a stunning feathered friend.
Choosing Your Paper
The right paper makes all the difference in origami. For this peacock, I recommend a few options:
Paper Type and Weight
Standard origami paper (kami) is a fantastic choice for beginners. It’s usually thin enough to fold cleanly but strong enough to hold its shape. Look for paper that’s around 70-90 gsm (grams per square meter). If you’re feeling more adventurous, you could try using Tant paper, which has a lovely textured surface and a slightly heavier weight, giving the finished peacock a more substantial feel. Avoid very thick paper like cardstock, as it will be difficult to fold accurately and will create bulky creases.
Paper Size
A good starting size for this peacock is a square sheet of paper that is at least 6 inches (15 cm) per side. This gives you enough room to make the smaller, more intricate folds clearly. If you’re aiming for a larger display piece, you can certainly use bigger paper, but be prepared for the folds to require a bit more precision.
Single vs. Double-Sided Paper
For this origami peacock, double-sided paper is ideal if you want a visually striking model. Many origami papers have a coloured side and a white side. If you use double-sided paper with contrasting colours on each side, you can create a beautiful effect where different parts of the peacock show different colours. For example, you might have the body in one colour and the tail feathers in another. If you only have single-sided paper, that’s perfectly fine too! Your peacock will still look lovely, with one dominant colour.
The Base Folds: Building a Strong Foundation
Before we get to the peacock itself, we’ll make a couple of fundamental folds that will serve as the base for our model. Practicing these clean folds now will make the rest of the process much smoother.
First, let’s create a “Waterbomb Base.”
1. Start with your square piece of paper, coloured side up if you are using double-sided paper.
2. Fold the paper in half diagonally, bringing the bottom left corner to meet the top right corner. Crease well.
3. Unfold the paper.
4. Now, fold the paper in half diagonally again, bringing the bottom right corner to meet the top left corner. Crease well.
5. Unfold the paper. You should now have two diagonal creases forming an ‘X’ on your paper.
6. Flip the paper over so the white side (or the less dominant coloured side) is facing up.
7. Fold the paper in half horizontally, bringing the bottom edge to meet the top edge. Crease well.
8. Unfold the paper.
9. Fold the paper in half vertically, bringing the left edge to meet the right edge. Crease well.
10. Unfold the paper. You should now have two perpendicular creases in addition to the diagonal ones.
11. Now, bring the two side points (where the horizontal and vertical creases meet the edges) inwards, towards the center. As you do this, the top point will naturally come down. Flatten the paper into a smaller square. This is your Waterbomb Base. Ensure the open points are at the bottom.
Next, we’ll make a “Preliminary Base” from the Waterbomb Base.
1. Take your Waterbomb Base and orient it so the open points are facing down towards you.
2. Take the bottom left flap and fold its bottom edge up to meet the center vertical crease. Crease well.
3. Repeat with the bottom right flap, folding its bottom edge up to meet the center vertical crease. Crease well. You should now have a kite shape on the front.
4. Flip the entire model over.
5. Repeat steps 2 and 3 on this side, folding the bottom edges of the two flaps up to meet the center vertical crease.
6. Now, take the very top point of the model and fold it down, aligning its tip with the point where the two diagonal creases of the kite shapes meet. Crease well.
7. Flip the model over again.
8. You should see a small triangular flap at the top. Fold this flap down, creasing it along the line formed by the top edges of the kite shapes.
9. Unfold the last two folds you made (steps 6 and 8).
10. Now, carefully open up the kite flaps you created in steps 2, 3, 5, and 5. Using the creases you just made, you are going to “petal fold” the layers upwards. Gently lift the bottom point of the topmost layer upwards, using the horizontal crease you made in step 8 as a guide. As you lift, the sides will come inwards along the diagonal creases you made in steps 2, 3, 5, and 5. Flatten the entire structure into a diamond shape. This is your Preliminary Base.
Numbered Walkthrough: Folding Your Origami Peacock
With our bases prepared, let’s bring our peacock to life!
1. Start with your Preliminary Base with the closed point facing upwards and the open flaps facing downwards.
2. Take the bottom left flap of the topmost layer and fold its outer edge to meet the center vertical crease. Crease well.
3. Repeat step 2 with the bottom right flap of the topmost layer, folding its outer edge to meet the center vertical crease. Crease well. You should now have a kite shape on the front.
4. Flip the entire model over.
5. Repeat steps 2 and 3 on this side, folding the outer edges of the bottom flaps to meet the center vertical crease.
6. Now, we’re going to shape the neck and head. Take the topmost pointed flap and fold it downwards, so its tip touches the point where the two lower flaps meet. Crease well. This fold creates the initial bend for the neck.
7. Flip the model over.
8. Take the corresponding flap on this side and fold it downwards, again so its tip touches the point where the two lower flaps meet. Crease well.
9. Now, we will begin to form the tail. Look at the two longer, pointed flaps at the bottom of the model. Take the rightmost of these two flaps and fold it upwards and outwards, at an angle. The amount you fold it determines the spread of the tail. Aim for a fold that brings the edge out at about a 45-degree angle from the body. Crease well.
10. Repeat step 9 with the leftmost of the two bottom flaps, folding it upwards and outwards at a similar angle to create a symmetrical tail.
11. Flip the model over. You will see a single pointed flap in the middle. This will become the peacock’s neck and head. Gently pull this flap upwards, at an angle that looks pleasing for the neck. You can adjust how far up you pull it to change the neck’s posture.
12. Now, to shape the head. Take the very tip of the neck flap and fold it downwards, creating a small point for the beak. Crease well. You can adjust the size of this fold to make the head more pronounced or subtle.
13. You’ll notice the body of the peacock needs some definition. Carefully open up the two flaps that form the sides of the body. Inside, you will see two layers that can be pulled apart slightly. Gently pull these layers apart to create more volume and a more rounded body shape. This is called “swelling” the model.
14. To make the tail feathers more prominent, gently curve each of the tail flaps outwards. You can do this by running your finger along the edge of each flap.
15. You can further refine the tail by making small zig-zag folds along the edges of the tail flaps. These are called pleats and will give the appearance of individual feathers. Make small, alternating folds along the edge.
Common Beginner Pitfalls and How to Avoid Them
Even experienced folders encounter challenges, so don’t be discouraged if you hit a snag. Here are a couple of common places where beginners might go wrong with this model and how to fix them:
* **Fussy Pleating:** In step 15, when you create the pleats for the tail feathers, it’s easy to make them too large or too uneven. To avoid this, try to keep your pleats very small and consistent. Think about making folds about 1/8th of an inch wide. If you find you’re struggling to make them even, it’s perfectly okay to skip this step entirely, or just make a single, gentle outward curve on each tail flap. The peacock will still look lovely!
* **Neck Too Stiff or Bent Incorrectly:** In step 11 and 12, shaping the neck and head requires a gentle touch. If you pull the neck flap too hard or make the head fold too sharply, it can look unnatural. My advice is to make these folds incrementally. Pull the neck up a little, see how it looks, and adjust. For the head, make a small fold, then refine it if needed. It’s better to make multiple small adjustments than one big, awkward fold. Sometimes, a slight backward bend at the base of the neck can help it stand up straighter.
Varying Your Peacock
Once you’ve mastered the basic folds, you can have a lot of fun experimenting!
Size
As mentioned earlier, you can easily vary the size by using larger or smaller square sheets of paper. Smaller paper will result in a delicate, miniature peacock, perfect for embellishing cards or gifts. Larger paper will create a more impressive statement piece for display. Just remember that as the paper size increases, the precision of your folds becomes even more critical.
Paper Pattern and Colour
This is where your creativity can truly shine!
* **Patterned Paper:** Origami paper comes in an incredible array of patterns, from subtle geometric designs to vibrant floral prints. Using patterned paper can give your peacock a unique and eye-catching look. Consider how the pattern might interact with the shape of the peacock – a feather-like pattern could enhance the tail, for example.
* **Colour Combinations:** If you’re using double-sided paper, play with different colour combinations. A bright, contrasting colour for the tail against a more subdued body colour can be very striking. You could even try using different coloured papers for the different sections if you’re feeling ambitious and willing to adapt the folds slightly.
* **Metallic or Iridescent Paper:** For a touch of glamour, try using metallic or iridescent origami paper. These papers will catch the light beautifully, making your peacock shimmer.
Displaying or Gifting Your Finished Peacock
Your completed origami peacock is a work of art, and there are many lovely ways to showcase it or share it with others.
Display Ideas
* **Desk Ornament:** Place your peacock on your desk as a charming companion while you work or study. Its elegance can bring a touch of tranquility to your space.
* **Shelf Decor:** A single peacock can be a beautiful accent on a bookshelf or display shelf. You can group several in different sizes or colours for a more dramatic effect.
* **Centrepiece:** For a special occasion or even just to brighten your dining table, an origami peacock can serve as a unique and conversation-starting centrepiece.
* **Mobile:** For a more whimsical display, especially with smaller peacocks, you could string them together to create a beautiful mobile.
* **Part of a Diorama:** If you enjoy crafting scenes, your origami peacock can be a stunning addition to a miniature world.
Gifting Ideas
* **A Symbol of Beauty:** The peacock is often associated with beauty, pride, and royalty. Gifting an origami peacock can be a thoughtful way to express admiration for someone’s elegance or grace.
* **Birthday or Holiday Gift:** It makes a unique and handmade gift for birthdays, holidays, or just as a thoughtful surprise.
* **Gift Topper:** A small, perfectly folded peacock can be a delightful embellishment for a wrapped gift. Attach it with a ribbon for an extra special touch.
* **Get Well Soon or Congratulations:** The vibrant beauty of a peacock can offer a cheerful message of encouragement or celebration.
* **For Craft Enthusiasts:** If you know someone who enjoys origami or crafting, your finished peacock can serve as inspiration or a lovely handmade present.
I hope you’ve enjoyed this journey into folding the origami peacock. Remember, the most important part of origami is the enjoyment of the process and the satisfaction of creating something beautiful with your own hands. Happy folding!
Conclusion
Congratulations on folding your very own origami peacock! We hope you enjoyed this step-by-step tutorial. Don’t worry if your first peacock isn’t perfect – every fold is a learning experience, and practice truly makes progress. We’d love to see your majestic creation! Share your origami peacock with friends and family. For your next adventure, try folding a classic origami crane or a playful origami butterfly. There’s a whole world of amazing paper projects waiting for you. Keep folding and keep creating!
